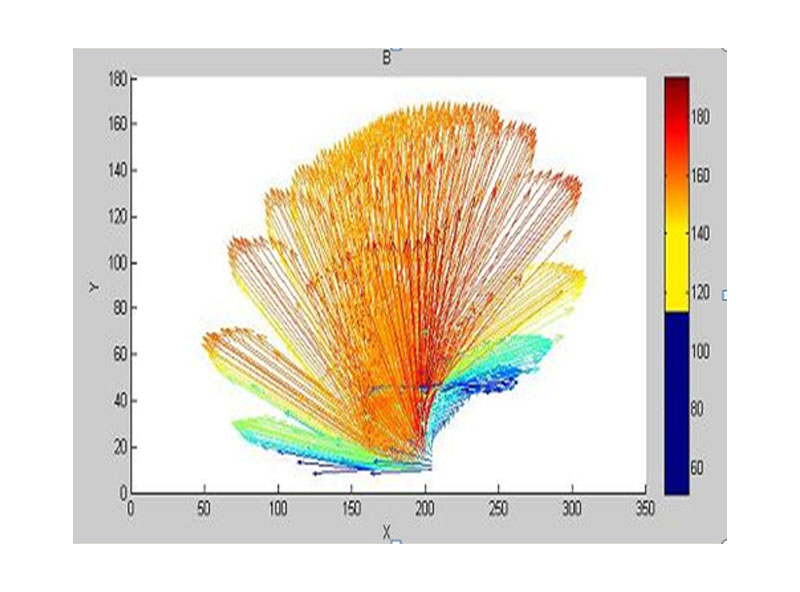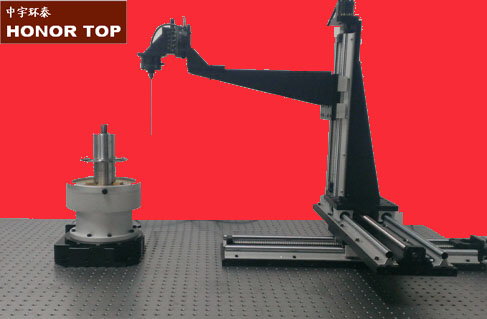

The system is composed of high precision Gauss meter (weak magnetic probe) or high precision fluxgate meter (fluxgate sensor) (divided into one-dimensional, two-dimensional,three-dimensional), multidimensional CNC micro platform (can be freely combined, according to the demand for choice of no magnetic platform series can) and the control and data acquisition software of drawing groups, mainly tests the spatial distribution of magnetic field(the earth's magnetic field change vector), can also be high precision testing of any shape space of AC and DC magnetic field three-dimensional magnetic field distribution, magneticstructure body of various shapes of magnetic solid distribution, uniform distribution, multi polar magnetic ring, N/S pole distribution, electric machine magnetic, superconducting magnetic field, magnetic resonance magnetic field and many other properties of magnetic field test.
Weak magnetic 3D magnetic field scanning imaging testing system is my company's R & D hasthe highest level of international digital automation high precision magnetic measuringplatform, mainly tests the spatial distribution of magnetic field (the earth's magnetic fieldchange vector), can also be high precision testing of any shape space of AC and DC magnetic field three-dimensional magnetic field distribution, magnetic structure body of various shapes of magnetic dimensional distribution, uniform distribution, multi polar magnetic ring, N/S pole distribution, motor field, superconducting magnetic field, magnetic resonancemagnetic field and many other properties of magnetic field test, rendering you need graphics,data storage and preservation of the print, listed for many years has been widely used in domestic and foreign aerospace industry and scientific research and many other units.
The characteristics of:
1, the system test range (stroke) range:
1) displacement platform space test range of 4000mm x2000mm x2000mm (x, y, z), three dimensional free travel options, and additional rotational degrees of freedom to a five dimensional platform.
2) Gauss meter magnetic field measurement range from 0.0001Gs to -30T
2, the system test precision:
1) magnetic field measurement of Gauss meter accuracy is very high, can reach the highestreading + 0.01% +. Free choice of one-dimensional Gauss meter, two-dimensional Gauss meter, three-dimensional Gauss meter, and equipped with micro Holzer probe minimumdimensions such as one-dimensional 0.15mm, two-dimensional 0.7mm, 3D 1.0mm,
2) displacement platform accuracy is very high, translational stroke step fine (resolution 0.00039mm) positioning accuracy of 0.01mm repeat positioning accuracy of less than 0.005 mm, the rotating stroke angle resolution of less than 0.0002 degrees, 0.01 degrees, the positioning accuracy of repeated positioning accuracy of less than 0.005 degrees, motion speed grade 2-64 subdivision. Fine distribution of realization of the test space in the physical space. The travel range 4000mm x2000mm x2000mm (x, y, z), three dimensional free traveloptions, and additional rotational degrees of freedom to a five dimensional platform.
3, a high degree of automation:
The system uses real time data acquisition and control computer, system software can be divided into a variety of forms design of test procedures, can be directly input is measured in aplane data and subdivision parameters to achieve a fully automated testing, automatic data record. Save, one-dimensional, can be generated automatically according to the test data of two dimensional, various graphical three-dimensional (2D standard drawing, 2D upside downmap, 2D radar map, three-dimensional curves, 3D mesh map, three-dimensional map, vector,the cylindrical expansion graph and the number of curves or more stereo diagram) and measuring data recording, database format to Access format and print the chart. The softwareof several common (the shape of space magnetic field, magnetic ring, rectangle, concentric circle etc.) scanning mode, can automatically scan only set a few parameters need to be, a high degree of freedom, high accuracy, without custody.
4, flexible combination method:
The 3D displacement platform and rotating platform with a variety of suitable for various testway assembled, to meet the different needs of the test, the system software covers the control and acquisition of each dimension, but also can be extended according to the requirements ofspecial needs, realize unmanned automatic monitoring and measuring. Through the computer control displacement platform controller and Gauss meter, can be correlated with the value of a position with the Gauss shift table meter read the data, a direction of the correspondingone-dimensional Gauss meter read is to exercise to the point of data values, three-dimensional Gauss meter is a point on the X direction value, Y direction, Z direction valuevalue, this point temperature (according to the needs of the probe and Gauss meter can havethe function of temperature compensation) and two two in total, three axis vector and vectorand the numerical value and direction angle.
-
QQ
- Online
- Technical
- After-sales
- Sales
-
Phone
- 15864236939

